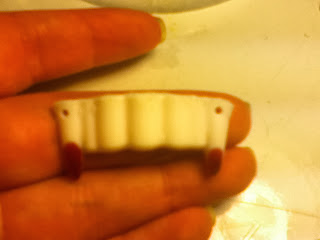
I'm making the entire piece from scratch- This is easy to do with EasyMold Silicone Putty!
I'm molding some of these cheap plastic fangs.
Press the putty into an oval shape, making sure it is wide enough to fit the fangs!
Press the front of the fangs into the putty.
Let these set for 20 minutes before unmolding the fangs.
Give it another 24 hours before using with resin.
Once the fang mold is ready we move on to casting the piece with EasyCast Resin. We also need some transparent red coloring and some opaque white coloring.
*ETI recommends wearing gloves for your safety* Gloves also help keep your nails nice!
Using popsicle sticks, prop the mold up at an angle with the fang tips at the lowest point.
This is to keep the "blood" (red resin) at the bottom of the fang tips.
Mix up a batch of resin and color it transparent red.
Add the red to the tips of the fangs using a toothpick.
Let this set for at least 12 hours before continuing with the white.
Mix another batch of resin, color this opaque white.
Now the mold can be laid flat and filled with the white resin.
Let this set for 24- 72 hours to harden.
Tilting the mold is a neat trick for dual colored pieces.
Drill a hole on each side of the fangs.
I'm manually spinning the drill bit to keep the hole placement precise.
I'm using a popsicle stick under the piece to protect my work surface.
When you drill holes be sure that the are close enough to the top edge for jump rings but far enough down so that the jump rings won't rip out.
Attach a chain to the resin with a jump ring on each side of the fangs.
Super cute necklace appropriate for vamp fans everywhere!!
Be sure to join me for a countdown to Halloween with festive projects each night!!


No comments:
Post a Comment
Thanks for stopping by!
Note: Only a member of this blog may post a comment.