How to make a mold with EasyMold Silicone Rubber:
(The exact intrustions from ETI follow the photo tutorial)You will need EasyMold Silicone Rubber, something to make a mold of (I'm using some resin buttons), Polymer Clay, Rice, a measuring cup to meausre the rice and silicone rubber, a cup or bowl to make the mold in, and some stirring sticks.
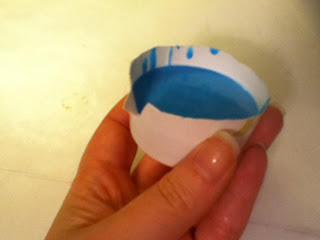
Start by setting up the container you're using to make the mold in. The items I'm molding are short so I can cut off the top part of the cup with an exacto knife.
Put the item/ items your molding into the container and pouring rice over the top!
Make sure they are completely covered and there is a good layer of rice over them. This is how to know how much silicone rubber to mix.
Pour the rice into the measuring cup and pull out your item(s). Put this aside for now, we will need it again in a couple of minutes.
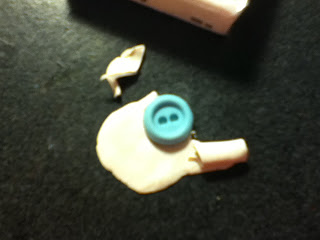
Use the polymer clay to secure the items to the container. Start by rolling out a thin layer of clay.
Place the item on the clay and cut around it.
Seal the layer of clay to the bottom of the item.
Press the clay to the bottom of the container to attach the item. Make sure to clean up the edges and that there aren't any gaps between the clay and the container.
Repeat this for all the items you are molding.
Now, back to the rice... Take the measurement of the rice and divide in half. If it measures 2 tsp, half would be 1 tsp.... The silicone rubber comes in 2 parts: A is white and B is blue.
Dump out the rice (You can save this to use later for mold making but I wouldn't eat it after handling it so much!)
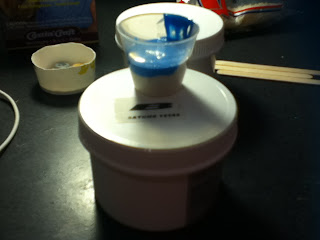
Fill the cup to you "half" measurement with part A...
Add the other half of part B make sure to add equal amounts of A and B even if you went over your original "half" amount.
Mix these together throughly until you get a uniform color.
To reduce air bubbles pour in a thin stream from several inches above the container and aim for a space beside the item(s) you are molding.
Once you've poured all the silicone rubber into the mold let it rest for atleast 24 hours to set.
When the silicone rubber has set, peel off the cup or pull out of the container.
Pull off all of the polymer clay and remove the items you molded.
Clean off the mold and let it rest for another 24 hours before you use it for resin.
These mold can be used just like any other resin molds!
The original buttons are on the left and the new buttons from this mold are on the right! They look just alike!
These are the exact instructions from ETI EasyMold Silicone Rubber:
EasyMold Silicone Rubber has 45
minutes to 1 hour of working time at 70° F / 21° C. Cooler temperatures will
result in slightly slower cure rates, while warmer temperatures will result in
faster cure rates. Mix only enough to make one mold at a time! If working with
gloves, use vinyl or nitrile gloves, which are sulfur free.
Step 1: Determine type of mold
best suited for your project. Glove, Cast/Glove, Blanket, or Block mold?
Step 2: Apply hot melt glue or
sulfur free clay to the base of the item and press firmly onto wax paper. This
creates a seal as well as securing the item. If creating a block mold, position
item in container and press firmly.
Step 3: Measure equal amounts of
parts A & B by volume. Blend until a uniform color is achieved. Note: For
block molds, determine how much silicone rubber is needed first. You can do
this by pouring rice into the area around and over the object in the contained
area. Then, pour this rice into a measuring cup to determine how much silicone
rubber to mix.
Step 4a: Glove or Blanket Mold -
Apply 3 to 4 layers with a brush. Your first layer should be a thin layer to
pickup detail and allow fine bubbles from mixing to escape. Allow each layer to
cure for 1 hour or until the layer begins to set before applying another layer.
This process can be sped up with heat from a hair dryer. Allow mold to cure 24
hours, then remove original piece. Mold is now ready to use.
Step 4b: Block Mold - See
“Removing Bubbles with Block Molds”. Pour EasyMold Silicone Rubber to the side
of the object, allowing the liquid silicone rubber to push out air as it fills
the container. Fill as required for a single, two or multipart mold. Allow mold
to cure 24 hours, then remove original piece. Mold is now ready to use.
Removing Bubbles with Block Molds:
During the mixing process, air is often mixed in creating tiny bubbles within
the mixture. These bubbles will for the most part dissipate on their own.
However with block molds, if you find bubbles are a problem, simply elevate
your container of freshly mixed silicone rubber approximate 30” above your
work. Then slowly pour a thin stream of silicone rubber to the side of your
piece until the mold container is filled. This thin stream of silicone will
allow trapped air bubbles to escape.
Heat Cure: In some instances, it
may be necessary to heat cure your mold. To do so, remove original item, place
mold on aluminum foil or cookie sheet and place in the center of an oven at
least 6” from elements. Do not use a toaster oven as the close proximity to the
elements may over heat and discolor your molds. Bake mold at 300° F / 149° C
for 30 minutes.
Note: a hair dryer or heat lamp
can also be used to accelerate the cure of the rubber. This process however
takes longer than an oven and the length of time required to heat cure the
piece will depend on the size of mold, thickness, etc. Allow mold to cool
before using.
Food Type Molds: All molds used for food type applications should be clearly marked to identify them as food molds. These molds cannot be used for non-food applications. Warning: once a food type mold has been used with non-food type products, the mold will be contaminated and cannot be used with food products again! Molds used for food type applications must be washed and dried between applications. Do not use mold release agents with food type mold applications.
Cooking/Baking: EasyMold Silicone
Rubber Molds can be used in the oven up to 400°F / 204°C. This allows you to
use your molds for baking, making chocolates, candies, etc. Do not use a
toaster oven, since the elements are too close and may cause the molds to
discolor.
Resin and Plaster Castings: EasyMold
Silicone Rubber makes great resin and plaster molds! It’s fast and easy to use.
However, EasyMold Silicone Rubber molds must be heat cured or allowed to fully
cure for a minimum of 24 hours prior. Pieces cast in molds not cured may result
in rough surfaces. 


No comments:
Post a Comment
Thanks for stopping by!
Note: Only a member of this blog may post a comment.