Welcome to my post for the DeNami Halloween Blog Hop!!
You should have arrived here from Pattie Goldman's wonderful blog if you just stumbled across my post or if you've gotten a bit lost head over to the DeNami blog for the complete list of blog hop participants.
Here's the blog hop details:

When: The blog hop starts on October 13 at 6 AM, PST. However, you have until October 14, 2013, 11:59 pm PST, to leave comments on all the blogs (to be eligible for a prize).Why: To be inspired by fun DeNami Design creations and also the chance to win mini shopping sprees on the DeNami Design website!
Prizes: We are giving away THREE $20 gift certificates to our website! We'll be giving away one gift certificate to a random participant (DT members not eligible) and then we'll also be giving away TWO gift certificates to TWO people who comment along the hop!
For my project I've made some costumed chickie pins!
The how-to follows but you can also scroll to the bottom for the link to the next hop participant's link and the giveaway info!
The how-to follows but you can also scroll to the bottom for the link to the next hop participant's link and the giveaway info!
DeNami Stamp: Chickie B90, EasyCast Resin, Mod Podge, E-6000, Glossy Accents, acrylic block, black ink pad, microbeads, bottle caps, pin backs, scissors, paper, and drawing tools.
Here's a close up of the cute little DeNami Chickie stamp B90:
Stamp the chickie on some yellow paper and cut it out...
Draw a costume around the chickie.
Here's a pic of some costume ideas:
Color the costume pieces...
Cut them out...
Now glue the chickie onto another piece of paper and glue on the costumes...
Cut out your costumed chickies!
Coat the chickies with a couple of layers of Mod Podge on the front and back to seal them.
Let dry.
Mix up a batch of EasyCast resin (see tab up top for mixing instructions).
*ETI recommends wearing gloves for safety* Gloves also help keep your nails nice!
Pour resin into the bottle caps but not completely to the top.
Place the chickie in the bottlecap and make sure it is covered with the resin.
Let this set for 24 - 72 hours for the resin to harden.
Once the resin has hardened it is simple to turn the bottle caps into pins.
All you need is E-6000 and pin backs.
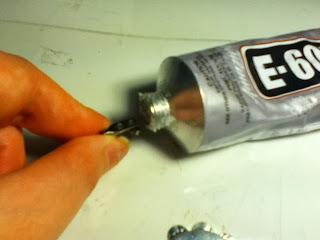
Add some E-6000 to the pin back...
Press firmly to the back of the bottle cap and let dry for 24 hours to get maximum adhesion.
Aren't these just the cutest way to spread some Halloween cheer?!

The next stop on the hop is Deb Fischer! I can't wait to see what she has for us this time :)Make sure to leave a comment here to qualify for the chance to win a DeNami Mini Shopping Spree!!


Emily, I love how you drew your own chickie costumes! Gorgeous project!
ReplyDeleteYour pins are adorable! What a cute idea!
ReplyDeleteSo creative and how adorable did they turn out?! I loved seeing your process.
ReplyDeleteWow! Emily, these are fabulous! I love the glittery background nestling each chickie. Perfect for halloween!
ReplyDeletewhat great ideas!!!! I can see these as magnets, too!
ReplyDeleteLOVE these!!!
ReplyDeleteHow super cute is this!
ReplyDeleteThanks for showing how you made them, I must give it a try!
Hugs
Rene
How cute!
ReplyDeleteWow, very impressive
ReplyDeleteLove your costumed chickies! What a great way to use the stamps! I love how you used the microbeads too. Great job!
ReplyDeleteThe pins are adorable! Love all the tiny details!
ReplyDeleteFabulous idea. Thanks for the tutorial.
ReplyDelete
ReplyDeleteExcellent hop! Thanks for the inspiration. I'm already a follower. I love how you're giving away supplies to make what you created! Thanks for the giveaways!!
La-Vie B.
Follow me at C’est La-Vie Designs Unlimited, LLC
How cute is this!?!?
ReplyDeleteSo cute and clever. Thanks for the tutorial.
ReplyDeleteisoscia at aol dot com
What a super fun project! Love how you dressed up the little chickies!!!
ReplyDeleteVery cute Chickie pins for Halloween!
ReplyDeleteThose are so cute! I love my little chickie stamp. These would be cute embellies for a card or page too.
ReplyDeleteThanks for sharing this great idea. :)
Grand project!
ReplyDeleteHow fun are these!!
ReplyDeleteOh these are so cute
ReplyDeleteand very doable! Thanks
so much.
Carla from Utah
Your pins are absolutely delightful! Such a fun Halloween project. :)
ReplyDeleteSuper cool project! TFS!
ReplyDeleteAbsolutely Adorable!
ReplyDeleteThanks everyone for all the sweet comments!!
ReplyDeleteAnd thanks to DeNami for offering such a great prize!!
Girl, you are a genius! Those are ohh so cute and wow, a lot of work with all that fussy cutting..ohh my!!
ReplyDeleteSo cute and so creative!!!! Love!!
ReplyDeleteI bet there are some chickaholics out there who would love these darling pins! Very cute!
ReplyDeleteOh how cute--great pins!
ReplyDelete