I am always on the hunt for projects that can be gifts for a guy. With boyfriends, dads, uncles, and grandfathers one needs a good "man" project.
I used EasyCast Resin, Castin' Crafts Mold Release, a mold, Mod Podge, Glossy Accents, and a deck of cards. Also, some scrap clear packaging, a permanent marker, and some scissors.
*ETI suggests wearing gloves when working with resin for safety* Gloves also help keep your nails nice :)
To make a template for the mold cavity I'm using a piece of scrap clear packaging (this is from a Martha Stewart Mold).
Put the packaging over the mold cavity and trace inside the space using a permanent marker. Cut out the packaging and now we have a template.
I'm using the cards to make a royal flush to go in the resin. You could also do a full house or black jack!
The borders of the cards are too wide to fit my template so I trimmed all the corners down.
Now that it fits I need to hold it that way!
Using some Glossy Accents, I glued all the card corners together. Glossy Accents dries in about 20 minutes but stays wet long enough to move the cards around to fit the template.
Put the template over the design and trace around it with the permanent marker.
Cut this out carefully.
Now is the time to do any trimming or regluing if needed.
Paint a couple of coats of Mod Podge on the card pieces to seal them.
Spray the mold with mold release and mix up a batch of resin. Pour a layer of resin into the mold.
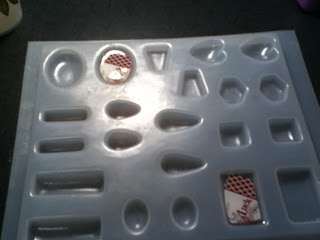
This is a mold from Yaley Enterprises.
They make resin and Deep Flex Resin Molds along with a variety of colorants.
Check out all the offer here: http://yaley.com/SitePages.asp?ID=46
Submerge the cards face down into the resin.
Top off the mold cavities with some more clear resin and let set to harden for 24-72 hours.
Very nice man-ly resin!
To turn these into key chains I'm using E-6000, bails, chain, split rings, key chain rings, some key chain hooks, and jewelry pliars.
Apply some E-6000 to the bail...
Press the bail firmly to the back of the resin piece and let dry for 24 hours to get maximum adhesion.
These are my key chain hardware...
Attach the keychain ring to the key chain hook...
Attach a piece of chain to the key chain ring using a split ring...
Attach the resin piece to the chain using another jump ring...
Now these key chains are ready for gifting... I think they'll be a real winner!!!
A place for learning how to make one of a kind resin jewelry pieces and accessories! Photo tutorials and inspiration!
Pages
- Home
- About Me
- How to mix a batch of EasyCast Resin
- How to mix a batch of EnviroTex Lite Resin
- How to make a block mold with EasyMold Silicone Rubber
- How to make a blanket mold with EasyMold Silicone Rubber
- How to mix a batch of Jewelry Clay
- How to mix a batch of Yaley Resin
- How to mix a batch of Amazing Resin


check you out, this is super cool! I've been wanting to try resin, but haven't gotten there...yet...
ReplyDeleteIf you try it let me know! I love seeing resin creations!
DeleteCool! I tried to work with resin a few times and every time was a disaster LOL
ReplyDelete-Zefaniya (Follow me #14)
Resin can be a bit particular :/ I've ruined many pieces on my path to create jewelry!
DeleteVery cool! I have yet to try working with resin. I have some in my craft closet, but have not worked up the nerve to mess with it yet. lol
ReplyDeleteFollowing through Google :)
Magena- Follow Me 14
www.childrenatplay2.blogspot.com
When you try it let me know how it turns out! It is a bit scary at first but with a little practice I bet you'll be making some great creations!
DeleteWow! What a great idea!!!!! :D
ReplyDeleteGreat blog!! Hope you have a great summer and blessings to you!!:)
-Liberty (libertylithium on swap-bot)
(Follow Me #14)
Thanks so much :)
DeleteI have never used resin before but now with looking at your site I may have to. What a great idea.. I wonder if I could make a Tardis..lol
ReplyDeleteFollow me #14
~Pashanista Swapbot
I've had thoughts about trying to make a Tardis- I may have to get to work on that idea! If you try some resin let me know! I would love to see what you create!
DeleteWhat a great tutorial! The keychains came out great. I should give it a try one day.
ReplyDelete~ Patti McHugh (PVMcHugh on Swap-bot)
Thanks so much!
DeleteOh my goodness!! These are sooo practical it seems we always need them here. You have done a superb job in your tutorial. I have used Ice Resin many times over, have not used this brand but have used the Enviro-Tex in the cigar purse making days many years ago. I enjoyed your blog, I am sooo loving the bangle with glow-in-the dark disc....EXCELLENT!! Thanks for sharing. Have a Beautiful day, Dawn Gallop stampmom9 swap-bot follow me #14
ReplyDeleteThanks so much! I haven't tried Ice Resin yet but it is on my to do list! Glad you like the tutorials- let me know if you try some out! I would love to see you take on it!
DeleteWow this is awesome! What a great gift idea, thank you! :D
ReplyDeletegreenafy on SB (Follow me 14)
Thanks so much and you are very welcome :)
DeleteI always wanted to learn this now I can...thanks
ReplyDeleteJbrooks351 swap-bot
I hope you enjoy it as much as I do!!
Delete