
I purchased a cheap black light at Wal-Mart for $5. It is a compact fluorescent that can be screwed into any normal sized light socket. I also saw a bulb just like this one of a different brand at Home Depot for the same price. While these bulbs don't pack the same punch as the ones in night clubs they are MUCH better than the ones that look like standard incandescent bulbs!

I started by gathering my supplies: EasyCast Resin, Castin' Crafts Mold Release, Mod Podge, a mold, flake stickers, glitter, microbeads, screw in eye pins, and a Hi-Liter!
*ETI suggests wearing gloves when working with resin for safety* Gloves also help keep your nails nice :)
The Hi-Liter contains flourescence which will glow under a black light this will work for most yellow, pink, and orange hi-lighters. Sadly, the purple and blue did not glow- it is easy to check which will glow before adding them to your resin by writing with them on a piece of paper and holding them under a black light.

Coat both sides of your stickers with the Mod Podge and let dry.

Spray your mold with mold release and set aside to dry while you mix a batch of resin.

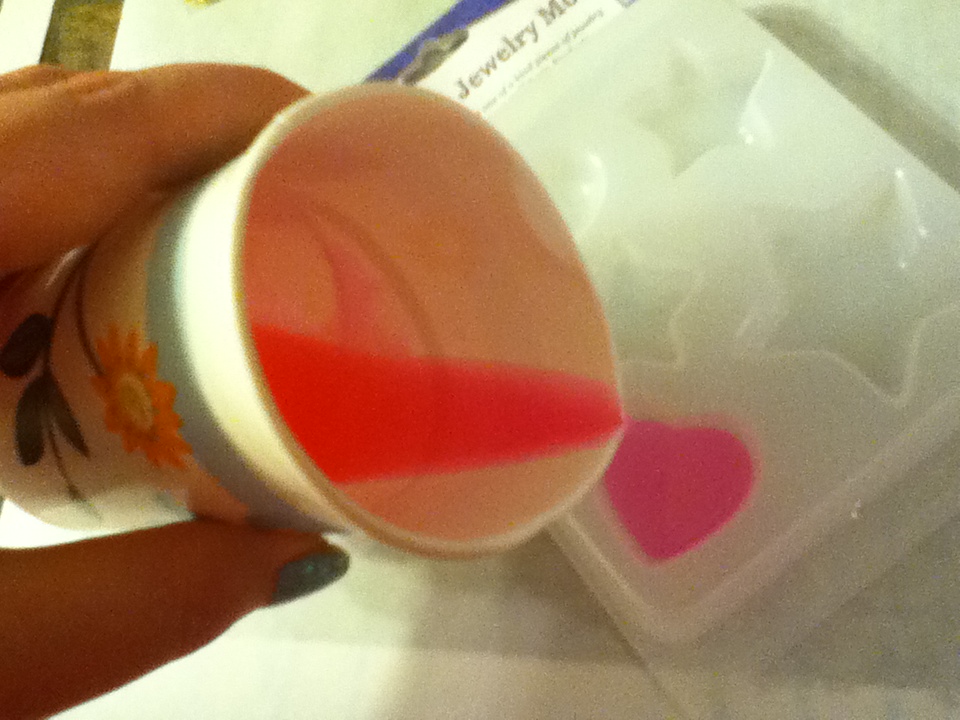
Now take the hi-lighter and open it up to get at the core. I found a seam in the plastic and used a pair of scissors to pry it apart.

Add a few drops of the hi-lighter fluid by sqeezing the core. I used 6 drops for this batch. Gently mix this into the resin. I stirred for about a minute to get it completely incorporated.

Pour the resin into the mold cavities you've chosen.
This is a mold from Yaley Enterprises.
They make resin and Deep Flex Resin Molds along with a variety of colorants.
Check out all the offer here: http://yaley.com/SitePages.asp?ID=46
Put the stickers into the resin face down and press them to the bottom of the mold. A toothpick works great for this.

I added some glitter.

And some microbeads.

Put this in a safe place to harden for 24-72 hours.
Once the resin has set you will be able to easily pop them out of the mold.

To turn the resin piece into a charm I am using a screw in eye pin. You simply pick the spot you want to be the top and firmly apply pressure while screwing the pin into the resin.

If you are worried about the stability of the screw you can unscrew it, apply a dab of E-6000 adhesive, and screw it back in. The E-6000 will need to set for 24 hours to be at its maximum adhesion.


No comments:
Post a Comment
Thanks for stopping by!
Note: Only a member of this blog may post a comment.