Showing posts with label Hair Pin. Show all posts

Saturday, June 8, 2013

Black Light and Glow in the Dark Butterflies


This time around I've combined the black light reaction with the ability to glow in the dark all while testing out some neat new products!! The results are very cool!!


For all the neatness, there weren't very many supplies this time: EasyCast Resin, Castin' Crafts Mold Release, a hi-liter, glow in the dark glitter, and a Martha Stewart Jewelry Clay Mold.
*ETI suggests wearing gloves when working with resin for safety* Gloves also help keep your nails nice :)


They have a brand new section of Martha Stewart stuff in the jewelry section at Michael's. One of the new products was this butterfly mold which has great detail!


I wanted to try out some different methods of making my resin glow and one of the things I found is Glow in the Dark Glitter (also at Michael's). They had Martha Stewart Brand and Recollections brand. I went with the Recollections since it was a bit cheaper.


I sprayed the mold with Castin'Crafts Mold Release and set it aside to dry and mixed up a batch of EasyCast Resin.


Then, I broke apart the hi-liter to get at the marker's core.


I squeezed a few drops into the resin and mixed thoroughly but gently to avoid air bubbles.


I poured in a healthy portion of the glitter and mixed it in well.


I pinched a pour spout into the side of the paper cup and very carfully poured it into the mold. Then I let it sit to harden for 24- 72 hours.


They came out of the mold very easily!


Under a black light the pink color comes through...


When you turn out the lights they glow green!


I opted to make them into hair pins using some E-6000 adhesive and these hair pins I found in the jewelry section of Hobby Lobby. They have a plate on the looped end perfect for attaching resin to!


Just add a dab of E-6000 to the plate.


Then firmly press it to the back of the butterfly and let the glue dry for 24 hours for full adhesion.


The little butterfly is so cute and no one would suspect all of its glowing abilities!!


Saturday, May 25, 2013

Glow in the Dark Resin Jewel Hair Pins

While working on making things glow, I thought I would explore not only black light reactions but also making resin glow in the dark! For my first glow in the dark resin project I made some awesome glowing jewel hair pins!


Gather your supplies… EasyCast Resin, Castin’ Crafts mold release, a cup and spoon, Glow in the Dark Puff Paint, a mold, E-6000, and some hair pins.  
*ETI suggests wearing gloves when working with resin for safety* Gloves also help keep your nails nice :)


The mold I’m using is actually made for hard candy. This will come up again when we are removing our resin from the mold.


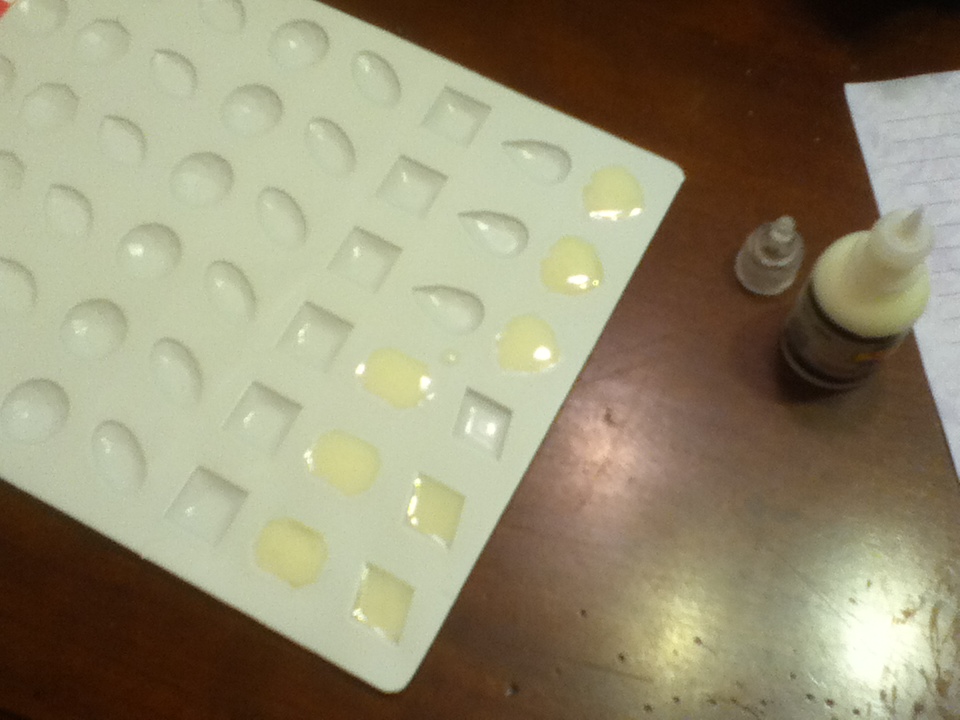
Spray your mold with Castin'Crafts Mold Release and set aside to dry and mix a small batch of EasyCast Resin.


Next, I am adding some glow in the dark 3d paint (also known as puff paint or deminsional fabric paint).  The natural color glows the brightest but there are other glow colors too: yellow, pink, orange, and green. I’m using Scribbles brand but Tulip brand should work too.


I just squeezed a little blob straight into the resin. Gently mix it in for another 30 seconds or so until it is a uniform color.

 
Pour it into the mold. A paper cup it great for this because you can pinch a pour spout into the side. For small molds like the one I’m using, pour slowly to avoid overflowing the cavities.


Set aside to harden for 24-72 hours.


The mold is made of plastic that is thin and brittle and really wants to hang on to the resin so, put your mold into the freezer for 10 minutes. The cold causes the molecules of the resin to contract which, in turn, helps the resin to release from the mold. It should now easily pop out of the mold. You may need to repeat this to get all of your resin pieces out of the mold.
 

Now they are out! Here is what the look like in regular light…

This is under a black light…


Here they are glowing away with the lights out!


To turn the jewels into hair pins, we will need some E-6000 adhesive and some hair pins ofcourse!

Take 2 jewels of the same shape and put some E-6000 on the back of one. Firmly press the hairpin into the adhesive on the back.


Add more E-6000 to the back of the other jewel and sandwich it onto the other jewel with the hair pin in between the two jewels. Be sure that you press the sandwich together firmly and that the jewels are lined up. Let this sit for 24 hours to get maximum adhesion.


Here is the side view of the sandwiched hair pin.


Now it is ready to wear. I’m thinking of a bun with several of these surrounding it!


Friday, April 19, 2013

Sprinkles in Resin Hair Pins

I am always on the look out for Vegan Sprinkles. It is amazing how many animal ingredients they can fit into such tiny things. It is also odd to me that a brand could have rainbow sprinkles that are vegan and chocolate that are not. Or jumbo size that are when the small size are not. Some of my lucky findings are:
Wilton Jumbo Rainbow Nonpareils
Marble Mix'ins Rainbow Sprinkles
Festival Confetti Sprinkles


While I do love to eat the sprinkles I also like to wear them! Encased in resin these lovely things can last for ages!


Gather supplies: EasyCast Resin, Castin' Crafts Mold Release, a mold, your favorite sprinkles, some glitter, cups, and spoons or stirring sticks (one cup and spoon/stick for each variety).
*ETI suggests wearing gloves when working with resin for safety* Gloves also help keep your nails nice :)


Spray mold with Castin'Crafts Mold Release and set aside to dry and Mix up a batch of EasyCast Resin.


Seperate the resin into cups for each variety you plan to make.


I'm making three varieties and have paired each type of sprinkle with glitter.


Pour in some sprinkles and a bit of glitter. Be sure that there is enough resin to coat all the sprinkles. These are the Wilton Jumbo Rainbow Nonpareils (found at Michael's) mixed with some orange glitter.


If you add too many sprinkles- like I did here you can scoop some back out if they are dry (do not eat them if you do this just in case there is some trace resin you didn't see!) A second option is to add some more mixed resin (if you still have some in another cup you can borrow it or just mix a small batch it only takes a moment). These are Marble Mix'ins Rainbow Sprinkles (found at WalMart) with some crystal glitter.


These are Festival Confetti Sprinkles (found at Hobby Lobby) with light blue glitter.


Mix the sprinkle resin well and pour into the mold. Be sure that all the sprinkles are completely covered with resin. If the sprinkles don't get covered with resin they will get gooey and sticky and the colors will bleed. Yuck! Let these set for 24-72 hours or until completely hardened before you unmold.


This is a mold from Yaley Enterprises.
They make resin and Deep Flex Resin Molds along with a variety of colorants.
Check out all the offer here: http://yaley.com/SitePages.asp?ID=46


When you pop these out you may run into spots where the sprinkles have poked through the resin on the front. This is can be caused by too many sprinkles and not enough resin or just because the sprinkles will settle to the bottom and when the resin is still freshly mixed it will scoot out of the way to accomadate the sprinkles- polite to the sprinkles but very rude to the resin artist!  If this happens, some pieces may be beyond help but if it is only a spot or 2 they can be salvaged! I had some with these spots infact the same ones I am making the hair pins with (this really works!)

Using some Glossy Accents fill in the holes and let dry. It dries in an hour or less to a smooth, hard glossy surface. Once the filled in holes have dried, coat the entire surface of the resin piece. Ta da fixed! You can't even tell which ones have been patched up!


I'm making hair pins out of these using some bobby pins and E-6000 adhesive.


Apply some E-6000 to the flat side of the bobby pin and firmly press to the back of the resin piece. Let them dry face down for 24 hours to get maximum adhesion.


Now these are ready to wear. I think they would make great birthday gifts or party favors too!