Sunday, October 27, 2013

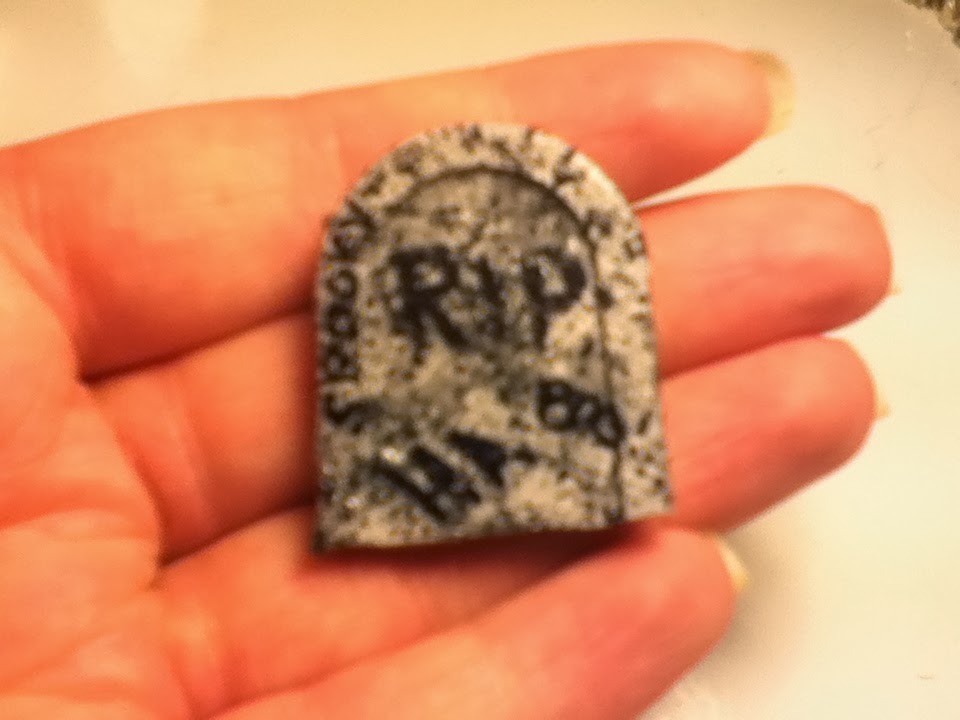
Textured Tombstone

Tonight's project is a textured tombstone pin!


I started by making a mold with EasyMold Silicone Putty and the lid of a nail polish...


The topper of these will come off if you pull straight up...


I mixed up a batch of the putty and made sure it was enough to fit around the lid...


I pressed the lid into the putty then brought the edges of the putty up around the lid to make a snug fit.
Let this sit for at least 2o minutes before removing the lid...


Give it another 24 hours before using with resin.


Mix up a batch of EasyCast Resin and add a drop of opaque white and a drop of black coloring...
*ETI recommends wearing gloves for your safety* Gloves also help keep your nails nice!


Swirl the drops in the resin but don't mix completely...


Fill your mold with the swirled resin and let set for 24-72 hours to harden.


How neat is the mottled effect! This is the base for our textured tombstone...


The key to getting a great stone texture on this piece is Krylon Make It Stone in Obsidian
They have several products that work well with resin.
You can ckeck them out here: http://www.krylon.com/products/


Be sure to find a well ventilated area and protect your work surface...


Spray with a light coat of the Make It Stone paint and let this dry for a few hours...


Seal the Krylon with a couple of coats of Resin Spray...


Once the resin spray has dried you could turn this into you jewelry piece or you can add some writing with a Sharpie...


I went for a graffiti look...


Seal the marker with an extra coat or two of Resin Spray.


To turn the piece into jewelry I'm using E-6000 and a pin back...


Add some E-6000 to the pin back and firmly press to the back of the resin piece.
Let this set for 24 hours for maximum adhesion.


I love how the swirled resin color mixed with the Krylon Make it Stone can transform the resin into apiece that looks like granite!


Saturday, October 26, 2013

Glittering Anatomical Heart

Tonight I'm sharing a super cool anatomical heart necklace! Being a nursing student I get a kick out of body parts- this is weird most of the time but for Halloween it becomes a main stream trend!


It is made with the Anatomical Heart Mold from Cats-Purrfect!
She has a lot of different molds available and she even has a YouTube channel display her molds!
You can get your own molds here: http://www.cats-purrfect.com/
And check out videos of them here: http://www.youtube.com/user/catspurrfect


Spray the mold with some Castin' Crafts Mold Release and settle the mold in a bowl of sand to keep it level...


Mix up a batch of EasyCast Resin and color it blue. I also added loads of blue glitter.
*ETI recommends wearing gloves for your safety* Gloves also help keep your nails nice!


Using a toothpick fill in the deepest areas of the mold.
Let this set for at least 12 hours before moving on.


Now mix up a batch of EasyCast Resin and color it red. To get a more blood color I added the tiniest amount of blue. I also added a bunch of red glitter.


Finish filling the mold and let set for 24-72 hours to harden.


Just gorgeous! The glitter settles into the bottom of the mold and makes it super sparkly!


To turn this awesome heart into a necklace I'm using Aanraku Assorted Large Bails. They have loads of pieces that work perfectly with resin! You can check out what they offer here: http://store.abasg.com/mm5/merchant.mvc


 Apply some E-6000 to the bail and press firmly to the back of the piece. Let this set for 24 hours to reach maximum adhesion.


I love how these bails have large loops so you can just slide it onto your necklace!


And now you have a great Halloween necklace perfect for zombie lovers and nursing students!


Friday, October 25, 2013

Halloween Bangle with Glowing Ghosts and Pumpkins

Tonight I'm sharing a fun Halloween bangle filled with little ghosts and pumpkins!


The little embedded shapes are made from glow in the dark polymer clay...


They were cut out using tiny polymer cookie cutters!


Just roll the clay out to about an 1/8 inch thick an cut several of each shape.


I wanted them closer in height so I shortened the ghost a bit.


Bake these in an oven at 275F for about 6-7 minutes.


Once they've cooled you can draw on faces with a permanent marker and seal with a coat of Mod Podge.


Mix up a batch of EasyCast resin and fill the mold.
*ETI recommends wearing gloves for your safety* Gloves also help keep your nails nice! 


Add the little shapes...


Let set to harden for 24-72 hours.


If the bangle has a groove you can add an extra dome of EasyCast resin and let set for and addition 24-72 hours.


I love how sweet this bangle is for those that don't want a spooky Halloween accessory.


And the glowing is a plus!!


Thursday, October 24, 2013

Spooky Eyes Pendant

Tonight's project is a doorway filled with spooky red eyes!


I'm using EnviroTex jewelry clay, gloves, baby powder, rolling pin, a stamp set, and eye shadow.
Also, Resin Spray, Envirotex Lite, and red coloring.


Put on your gloves.
Mix up a batch of jewelry clay and shape it into a door shape.


Stamp some eyes into the clay creating deep impressions.


Coat the piece in some black eyeshadow.


Poke a hole in the top with a toothpick for a jump ring.


Let this set to harden overnight.


Once harden spray with a coat of Resin Spray.


This will seal in the eyeshadow.


It also adds a great shine!


Mix up batch of EnviroTex Lite and color it red.
I also added some red glitter.


Use a toothpick to fill in the eyes with resin.


Let the resin set for 24-72 hours to harden.


Attach to a necklace with a jump ring  and you're ready to get your spook on!