Pages

Thursday, October 31, 2013

Sparkly Owl Ring

Happy Halloween
For tonight's project I have a cute owl ring!!


I'm using EnviroTex Jewelry Clay...


For my focal piece I'm using a pink owl previously made with EasyCast Resin and a Martha Stewart Mold.


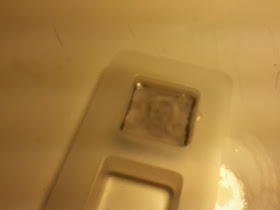
I found this ring at WalMart and knew it had potential. It has a epoxy sticker glued into a recessed area. I'm using an awl to pick away at the corner and pry it out!


Now I have a nice indent to work with!


Put on your gloves and mix up a small batch of Jewelry Clay...


Fill in the area on top of the ring...


Press your focal piece into the clay first...


Then add some gemstones around it...


Lastly, brush on a coat of PearlEx to color the exposed clay areas.
I'm using PearlEx 692 Duo Green-Purple. PearlEx works wonderfully with resin.
You can check out all the colors they make here: http://www.jacquardproducts.com/pearl-ex-pigments.html


Let this set for 24 hours to cure.


Once hardened brush off any excess PearlEx Powder.


I love pink and sparkly and it was so easy to do!!


Wednesday, October 30, 2013

Perfectly Poe Pendant

What better icon for a Halloween project than Edgar Allan Poe?! He is one of the greatest horror authors of all time! He is also the basis of a show called The Following if your into serial killers and looking for something to watch on Netflix!


For this project I'm using EasyCast Resin, Mod Podge, Bead's Landing Square Mold, and a printed picture of Edgar Allan Poe.


Cut your image to fit the mold...


Coat it, front and back, with about 3 coats of Mod Podge and let dry...


Mix up a batch of EasyCast Resin and fill the mold about halfway full...
*ETI recommends wearing gloves for your safety* Gloves also help keep your nails nice!


Submerge the image and get rid of air bubbles that might have gotten stuck in front of the picture...


Finish filling the mold...


Let set for 24-72 hours until hardened.


Now your have the imaged captured permanently and it looks crystal clear!


To turn the piece into a gothic novelist-worthy necklace I'm using E-6000, a bail, and a thick black velvet ribbon necklace I found at Michael's- it even came with a jump ring attached!


 The bail I'm using is a medium heart bail from AanRaku Glass Studios! They have a great selection of pieces that work perfectly for resin! Check them out here: http://store.abasg.com/mm5/merchant.mvc

Apply E-6000 to the bail...
 

Press firmly to the back of the piece and let set for 24 hours to reach maximum adhesion.


Attach to the necklace with the jumpring and you're ready to Danse Macabre the night away!!


Tuesday, October 29, 2013

Pumpkin Patch Hair Clip

 Tonight I'm sharing a sweet pumpkin hair clip!


I'm using EasyCast Resin, opaque yellow coloring, translucent red coloring, glow in the dark glitter, green ribbon, and a pumpkin mold.


This mold is one of several great molds by http://juliesbits.blogspot.com/ They work wonderfully with resin and polymer clay and can even be used for food! You can check them out here:
http://www.etsy.com/shop/WhysperFairy?ref=em and here:
http://www.etsy.com/shop/Molds4You?ref=em
 

 Mix up a batch of EasyCast resin.
*ETI recommends wearing gloves for your safety* Gloves also help keep your nails nice!
Color it yellow and add a touch of red to get the shade of orange you like.
I also added some glow in the dark glitter to the mix.


Fill the mold with resin and let set for 24-72 hours until completely hardened.


Isn't the detail of this mold great?! 


To turn it into a hair pin you'll also need a hair clip and some E-6000.


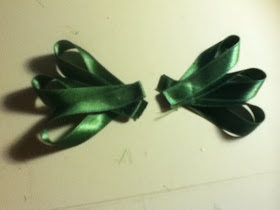
Make a cluster of loops with the green ribbon....


I'm using the hair clip to help hold them in place...


Glue the ends of the loops together to secure them, a toothpick helps get into the tiny folds...


Make a second cluster for the other side...


Glue these together by overlapping the ends...


Then add some E-6000 to the pumpkin and firmly press in the center of the ribbon.


Let this set for a while before continuing.


Now add some E-6000 to the hair clip...


Press it firmly to the back of the ribbons and let it set for 24 hours to reach maximum adhesion.


What a sweet little hair clip with the ribbons acting as the pumpkin's vine!


In the dark the glitter adds a ghoulish glow!


Monday, October 28, 2013

Creepy Bug Keychain

Tonight I'm sharing a creepy bug suspended in resin!


I found this poor little guy dead behind the window blinds and thought I could help give his life a bit of extra purpose :)


I'm using the mold I made using a grape (tutorial here http://resinjewelry.blogspot.com/2013/09/fall-ow-me-into-autumn-day-4-molding.html) and I settling it in a bowl of sand to make sure it's level.


Mix up a batch of EasyCast Resin and fill the mold about halfway full.
*ETI recommends wearing gloves for your safety* Gloves also help keep your nails nice!
 

Add the dead bug and make sure he is right side up in the mold.


Let this set for about 12 hours before continuing.


Mix another batch of resin and finish filling the mold.


Let this set for 24-72 hours until hardened.


The fly floats in the resin so by doing 2 pours it ensures he'll be in the middle of the piece.


To finish making your creepy accessory you'll need E-6000, a keychain, a bead cap and eye pin, and some pliers.


 Fashion the bead cap and eye ring into a topper (tutorial here http://resinjewelry.blogspot.com/2013/10/halloween-glowing-glitter-globe.html) and add some E-6000...


Attach to the resin piece and let set for 24 hours to reach maximum adhesion. Settling the piece in the sand will help it stay put while the glue dries.
Attach to the keychain and it's ready to creepy out your friends.


This could also make a neat gift for bug collectors or entomologists!